Posts mit dem Label Minc werden angezeigt. Alle Posts anzeigen

2016/10/30

Christmas Card #13 | MFT

Hi everyone! When I first tried out the screen ink together with the beautiful art screen 'wood' I had the idea of this card which I am showing you today.


I made a whole set with 6 cards in total because I will need them for family members. So I cut down pieces with 11 x 11 cm (4,3 x 4,3 inch) and used the art screen and screen ink like a stencil. After letting it completely try I put gold foil on top of it and ran it through my Minc machine. I also tried a background using minc paper from the 5th avenue collection.


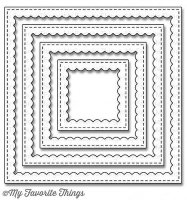
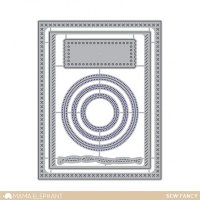
Then I diecut frames out of gold glitter cardstock using the second largest die from the 'stitched square scalloped frames' from My Favorite Things. I also used the same die to cut the inside of the frame out of white cardstock.

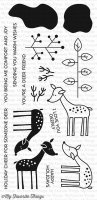
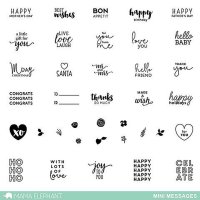
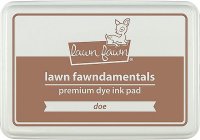
Then I stamped the cute images from 'deer friends' (MFT) with lawn fawn ink pads. I also added the small sentiment from the 'mini messages' stamp set (Mama Elephant).


To add more interest I diecut white birch trees with the MFT die, adhered them next to the deer and ran the whole square piece again through my Big Shot using the same square die as before - so that I have the same edges for the trees as well.


After that I adhered everything to a craft cardbase!
So happy that the cards turned out exactly the way I wanted to :)

Thank you for stopping by and have a great day!

xo
Lisa

Supply List


2016/07/07

Danke (Thank You) | Mama Elephant

Hello everyone! For my sister I made this teacher thank you card for four school children. It's a rather simple card but I tried to use pastel colors because they are the teachers favorite.

So I started by ink blending the colors cracked pistacchio, spun sugar and dried marigold. Then I diecut three circhles using the 'sew fancy' dies from Mama Elephant. I traced the circles onto a Copic friendly paper and stamped the cute children from the ME stamp set 'in my heart'. I colored them in with Copic markers.


Before I assembled the card I diecut the German word for thank you and foiled it with the Minc machine using light pink foil. I clued the piece with the kids-images and the top layer to a standard-sized cardbase, added the foiled sentiment and clear sequins from Pretty Pink Posh.


The card was all done and I hope the teacher will like it.

Thank you for stopping by and have a wonderful day!!

xo
Lisa

Supply List


2016/01/04

Love you cutie | Mama Elephant, Minc

Hi everyone! I am finally back from taking some days off or from spending days for making Christmas and New Year gifts :-). I hope you had a wonderful time with your family and friends!!

Today I want to show you my first background with my new Minc machine from Heidi Swapp. Because I am a stamper I prefer using this machine with stamps instead of a laser printer.


So I started by stamping the two hearts from the Paper Smooches stamp set ‚Scripty Sayings‘ with Versamark ink multiple times and then heat embossed it with Ranger sticky embossing powder. I always use my powder bag before embossing but you could also use kitchen flower to prevent the powder sticking to areas you don’t want it. After that I covered all the hearts with little pieces of Minc foil. It would definitely be less time-consuming if you used only one large piece of foil but I wanted to include 2 different colors (rose gold and light pink).

A very positive effect of using the Minc mashine after embossing is that it flattens out the paper quite well.

After that I stamped the little racoon from the ‚Three amigos‘ stamp set from Mama Elephant and colored it in with Copic markers. For the sentiment I used the 'Mini Messages' stamp set. After fuzzy cutting the image I prepared a stripe of black cardstock for heat embossing because I decided to use foil again. So I repeated the procedure from the background with the word ‚cutie‘ from the Paper Smooches stamp set with rose gold foil.


I adhered the racoon with foam tape and stamped the hearts I used for the background with Memento tuxedo ink. After covering them with glossy accents I cut and clued them to my background to add a little bit more black to the card. I also stamped little points (Snow Day stamp set) between the hearts because it was still too shiny for me.
Last but not least I adhered the white cardstock to a light pink cardbase.

Thank you for stopping by and I’ll see you soon,
xo

Lisa

Supply List

Copic Markers: C1, R20, W1, W3, W5, W7